Helpful Hints
A collection of tips and tricks to help you with your entries.
Encoding with QuickTime
By: Eric Scheur
Published June 29th, 2008
Welcome to the first in a series of short articles designed to help you get the most out of the 11 Second Club. Some of these articles will be technical in nature, while others will focus on techniques and helpful hints for using the community and competition to further your skills.
Today, we will be walking through the steps of preparing your finished animation for uploading to the 11 Second Club's monthly competition. Preparing a video can be confusing, especially when there are so many variables to take into account. What size the output should be? What codec to use? And for goodness sake, how do you get this thing to be under the 10 megabyte upload limit?? By the time you've finished reading through this article, you should have all the information you need (and maybe even a bit extra!) to make sure your video meets all of the 11 Second Club's technical requirements.
One last note: There are many ways of encoding your video for submission to the contest, and you are welcome to choose whatever method works best for you, whether it's an Flash Video (.FLV), DivX (.AVI), or some other method. This article outlines the steps that have yielded successful results for us time after time. Feel free to play around with the settings and find your own workflow.
The steps in this article assume that you are using Quicktime 7 Pro to prepare your submission. Quicktime 7 Pro is an upgrade from the free Quicktime 7 Player, available at Apple's site for $29.99. The Pro version has options and features that make it an invaluable tool for any animator and is highly recommended.
Ready? Here we go!
Step 1 - The Original File
We start off with our movie at the original size we've rendered it out of our animation software. The 11 Second Club requires that all submissions be 560 pixels in width by 316 pixels in height, or a compatible 16:9 aspect ratio, eg. 640x360 is a standard 16:9 aspect ratio.
Here is the file we're starting with:
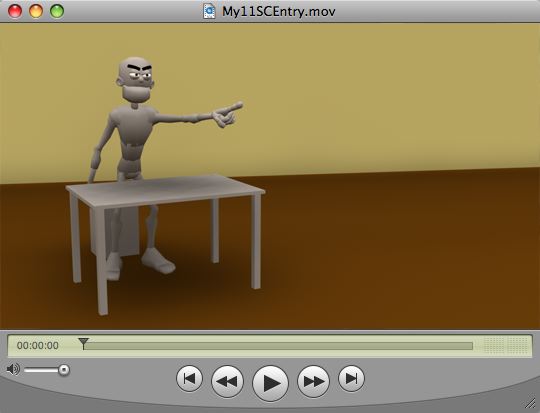
This movie is 640 x 360 pixels, and the filesize is 121.4 MB, well over the 10MB limit required for all 11 Second Club submissions.
Step 2 - Begin The Export Process
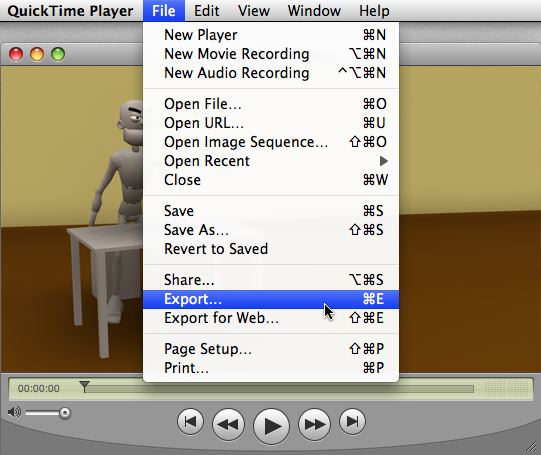
From Quicktime Pro's File menu, click on the Export menu item.
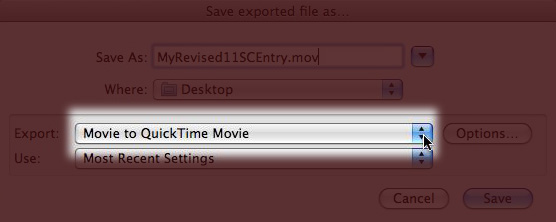
In the "Save exported file as..." dialogue, click on the Export options dropdown list...
and select Movie to MPEG-4
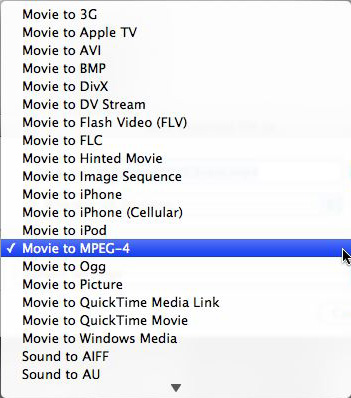
Then click on the Options button.
Step 3 - Video Export Settings
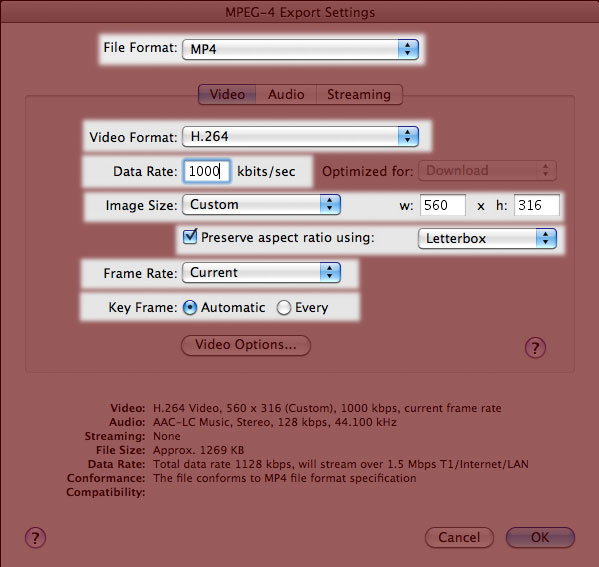
The MPEG-4 Export Dialogue menu has three sections. We'll be changing the settings on two of them, starting with the Video tab.
To get the best results for your video, while getting down to the smallest filesize, make sure that your settings are as follows:
- File Format: MP4
- Video Format: H.264
- Data Rate: 1000 kbits/sec
- Image Size: Custom
- w: 560
- h: 316
- Put a checkmark next to "Preserve aspect ratio using" and select Letterbox
(Note: this is only necessary if your animation does not have a 16:9 aspect ratio) - Frame Rate: Current
- Key Frame: Automatic
The resulting panel should look like this:
Step 4 - Audio Export Settings
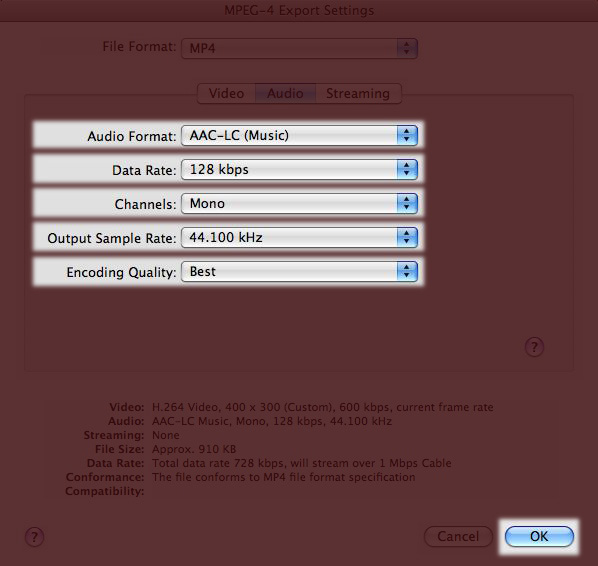
The audio settings panel can have a significant effect on our eventual file size. Click on the Audio tab:
Then, make sure your audio settings are as follows:
- Audio Format: AAC-LC (Music)
- Data Rate: 128 kbps
- Channels: Mono
- Output Sample Rate: 44.100 kHz
- Encoing Quality: Best
When your settings match these, click OK. Take a breath, we're almost done.
Step 5 - Save Your File
Now that all of your options and settings have been entered in, all that's left to do is save the new file. Click Save
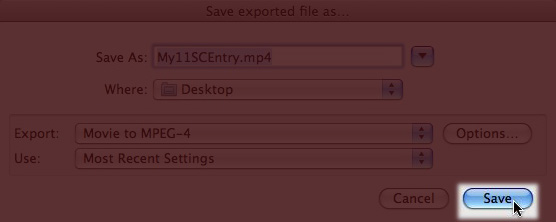
You may have to wait a minute or so for Quicktime to fully export your video.
Step 6 - Examine The Final Output
With our animation exported into its new format, it's time to check the file to make sure we're satisfied with it. Here's how my new file looks:
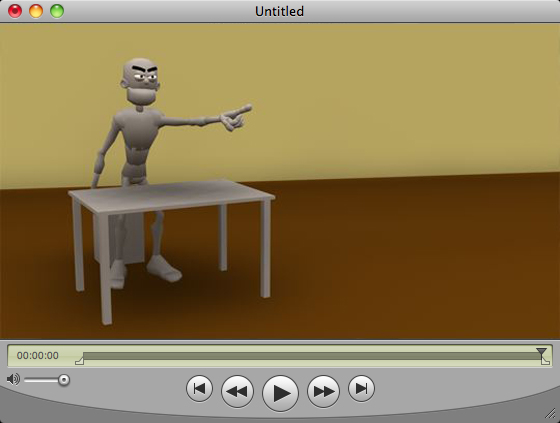
It is now 560 pixels by 316 pixels, which is the correct size for 11 Second Club competition entries.
Watching through my video several times, I notice that there is hardly any evidence of quality loss in the picture. That's the magic of the H.264 codec that we set back in Step 3.
Finally, the big test: filesize. My original animation file was 121.4 megabytes. After all of this tweaking of the settings, the final filesize comes out to be... 312 kilbytes!! That's over 350 times smaller, and well within the parameters for uploading to the 11 Second Club!
And there you have it: 6 simple steps to get your video exported, saved, and ready for voting. So, what are you waiting for? Enter this month's competition now!
I hope this has been a helpful guide for anyone having trouble preparing their final animation for the monthly competition. Stay tuned for more Helpful Hints in the coming weeks and months. Until then, happy animating!
- Eric
comments powered by Disqus


